

Quick Start
You will build a small robot system on Stellar X and drive a simulated Clearpath Jackal in NVIDIA Isaac Sim with Strider. It takes about 15 minutes once Stellar X is on your network and Isaac Sim with the Isaac Bridge extension is installed (see Before You Start). You will:
- add an actuator gateway and a Strider controller on Stellar Station,
- load their design documents,
- connect Isaac Sim, and
- jog the robot from the browser.
flowchart TB
    B["Your browser<br>Stellar Station · Strider"]
    subgraph SX ["Stellar X"]
        S["Strider<br>sodero.mlc.jackal"] -- servo_link --> G["Actuator gateway<br>sodero.actuator_gateway.jackal"]
    end
    I["Isaac Sim + Isaac Bridge<br>robot /World/jackal"]
    B --> S
    G -- "LAN · TCP 53333–53335" --> I
Before You Start
| You need | Details |
|---|---|
| Stellar X | Powered on and reachable from your PC (Stellar X › Network Configuration, Network Settings). In this guide its address is 192.168.60.18, an example address on a lab network; use your controller's address instead, for example 10.0.0.1 on a direct cable. |
| A PC with NVIDIA Isaac Sim | Isaac Sim 6.0 with the Isaac Bridge 1.0.0 extension installed and enabled (Install Isaac Bridge), on the same network as Stellar X. In this guide its address is 192.168.60.20. |
| Example files | jackal.gw (gateway), jackal.sddm (Strider) and jackal_warehouse.zip (Isaac Sim scene, 6 MB). Download all three and extract the scene. |
The Isaac Sim PC must accept TCP connections from Stellar X on ports 53333–53335. Allow them in its firewall (Install Isaac Bridge).
Tip: If you will continue with Navigate in Simulation, start Isaac Sim for this guide with the camera setting of its Step 1. Then you do not need to restart Isaac Sim later.
Step 1: Add the Gateway
- Open
http://192.168.60.18in your browser. -
Click Add node, choose Gateway ①, then Actuator gateway ② and click Next ③.
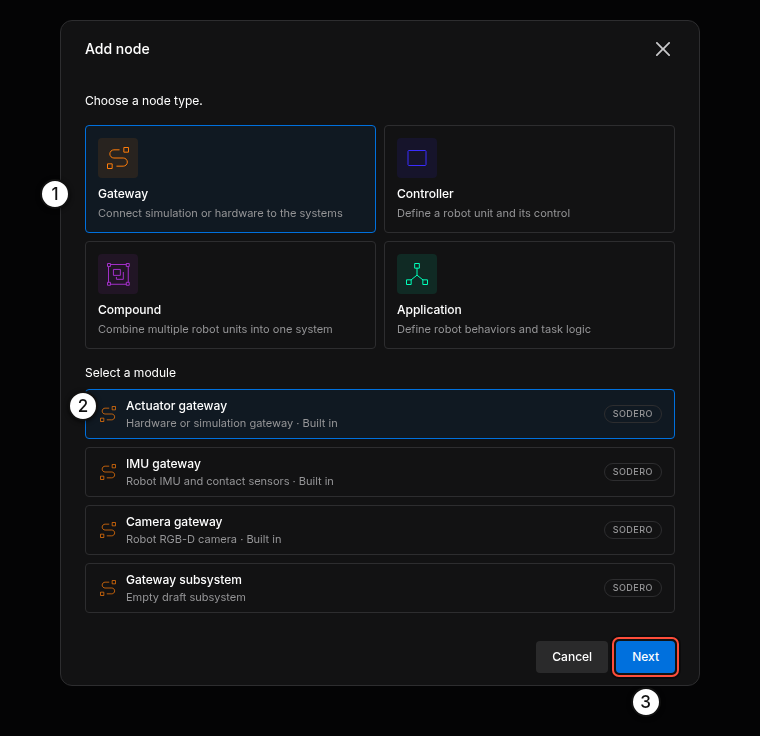
Gateway › Actuator gateway -
Name it
jackal① and click Add node ②.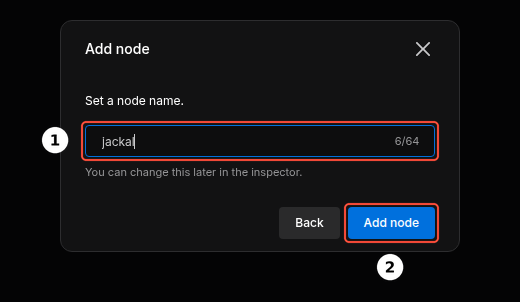
Step 2: Load the Gateway Document
- Select the new node
sodero.actuator_gateway.jackal. In its inspector, click the upload icon in DEFINITION (Import .gw). -
On From your PC ①, choose
jackal.gw② and click Import ③.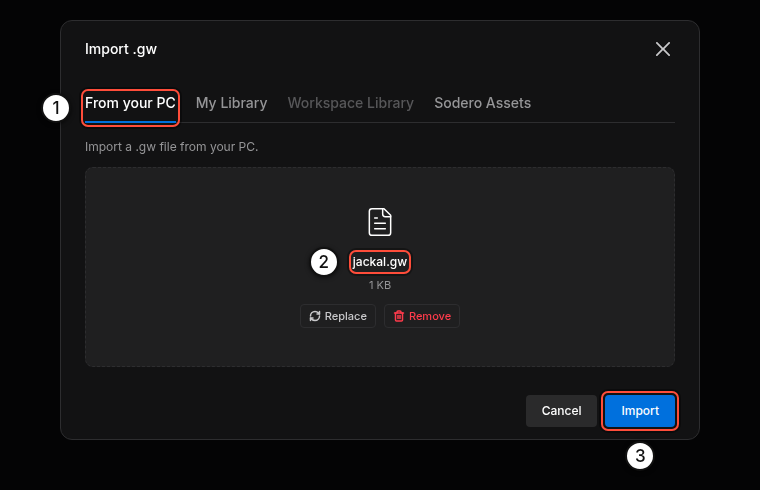
-
In TARGET, click Change and set the two values:
- Robot name ①:
jackal. It must equal the robot's prim name in Isaac Sim (/World/jackal). - Sim host ②: the IP address of your Isaac Sim PC.
Click Done ③.
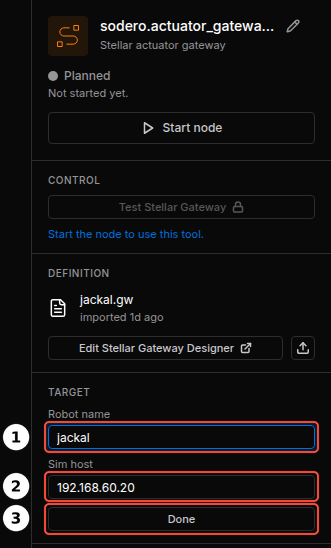
TARGET: ① Robot name ② Sim host ③ Done - Robot name ①:
If the robot name differs from the prim name in Isaac Sim, the gateway waits forever and the robot never moves.
Step 3: Add Strider and Connect It
-
Click Add node, choose Controller ① › Strider ② and click Next ③. Name it
jackaland click Add node.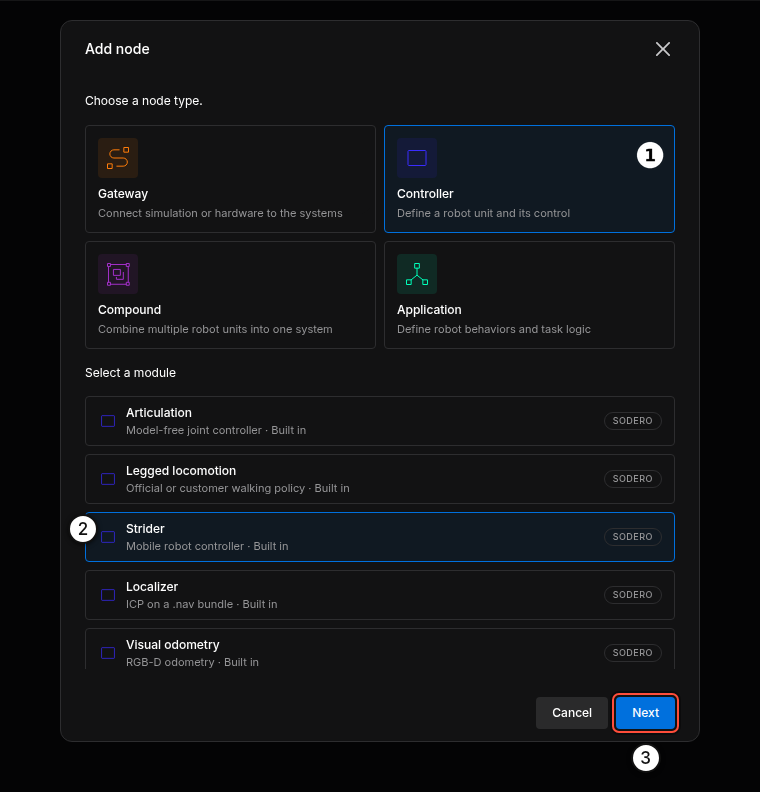
-
Select
sodero.mlc.jackaland click the upload icon in DEFINITION (Import .sddm). On From your PC ①, choosejackal.sddm② and click Import ③.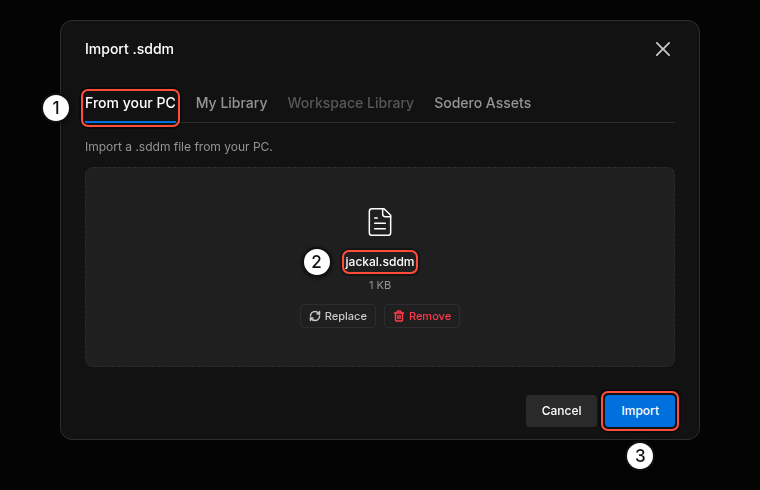
-
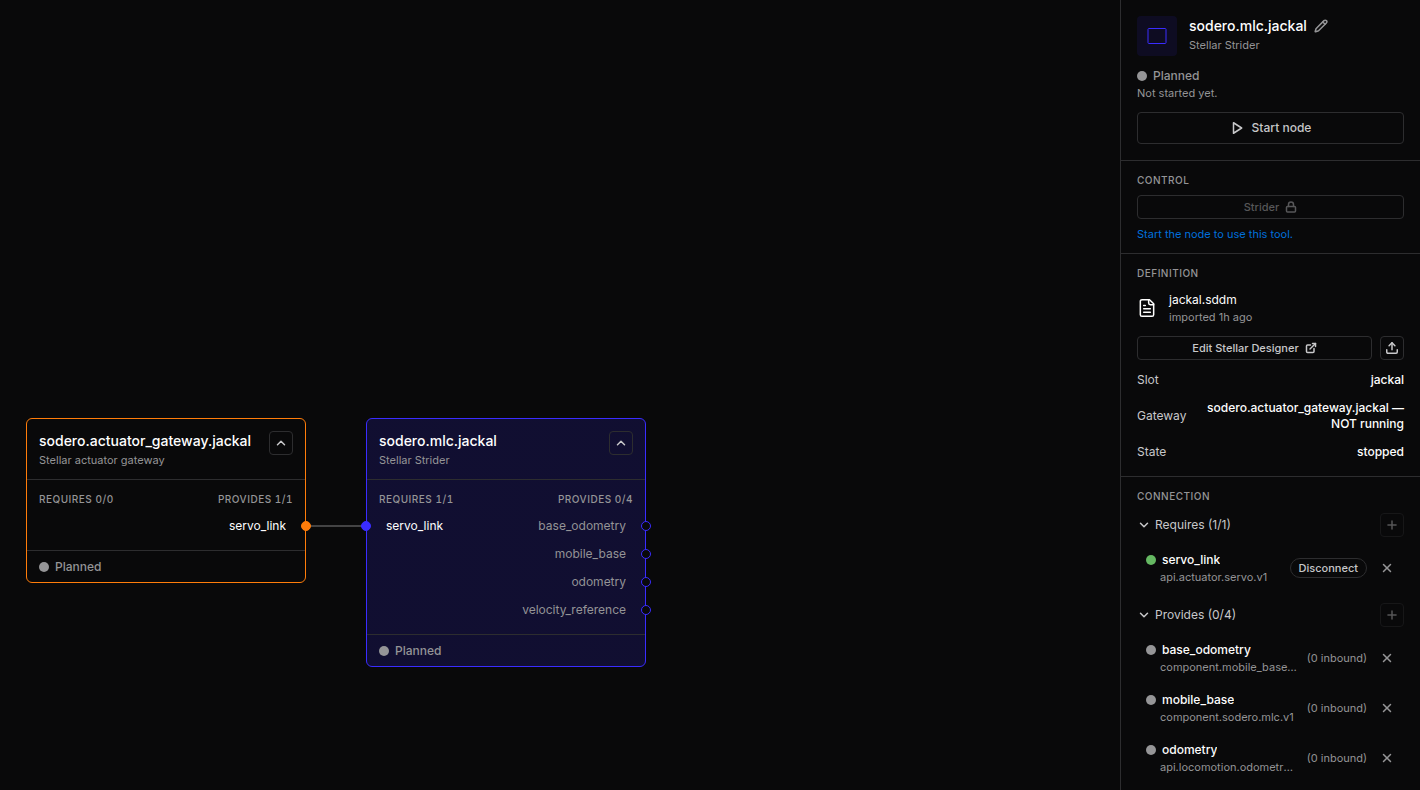
Connect the two nodes: drag from the Strider's
servo_link(left edge) to the gateway'sservo_link(right edge), or click Auto-connect next toservo_linkin the Strider's inspector.
Step 4: Play the Scene in Isaac Sim
- Open
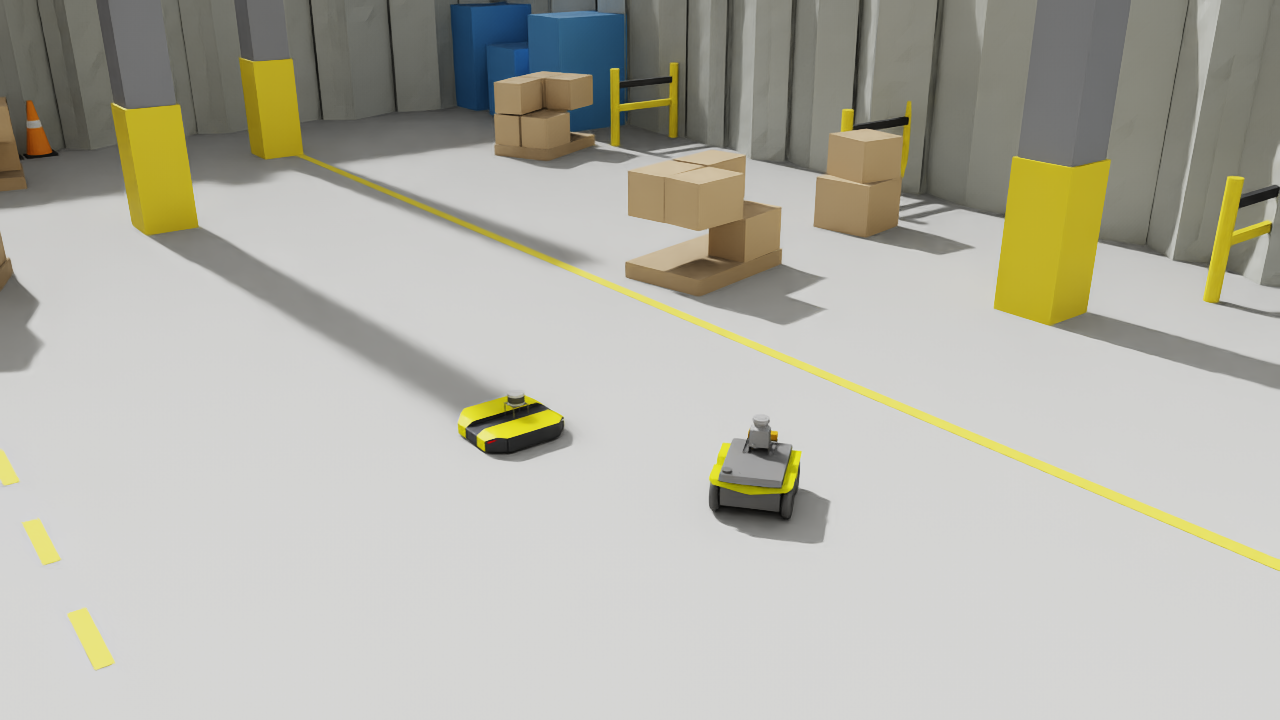
jackal_warehouse.usdin Isaac Sim (File › Open). The scene contains a Clearpath Jackal at/World/jackaland a Clearpath Dingo at/World/dingo_din a warehouse. - Press Play.
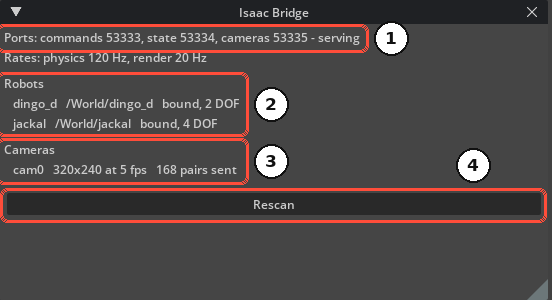
- Open Window › Isaac Bridge. It shows the ports as serving and
jackal … bound, 4 DOF.
Tip: To use your own robot instead, prepare its scene as described in Prepare the Robot: its articulation prim name is its robot name, and its joints, in order, are the gateway's actuators.
Step 5: Start the Nodes
- Select the gateway and click Start node. Wait until its state is Operating.
- Select the Strider and click Start node.
In the gateway's LOGS (stream Gateway events) you see the connection to Isaac Sim:
Gateway sodero.actuator_gateway.jackal starting: simulation, 4 actuator(s), 1.0 ms cycle.
Simulation: robot 'jackal', simulator at 192.168.60.20; waiting for it to start.
Simulator connected.
Step 6: Jog the Robot with Strider
- In the Strider node's inspector, click Strider in CONTROL. Strider opens in a new tab.
- Open the Drive page (gamepad icon in the left rail).
- Under Drive Mode, click Twist ①.
- Under Servo / Safety, switch Servo On ②.
- Press and hold Forward (W) on the pad ⑤. The robot drives while you hold the button and stops when you release it. Turn Left (A), Turn Right (D) and Backward (S) work the same way.
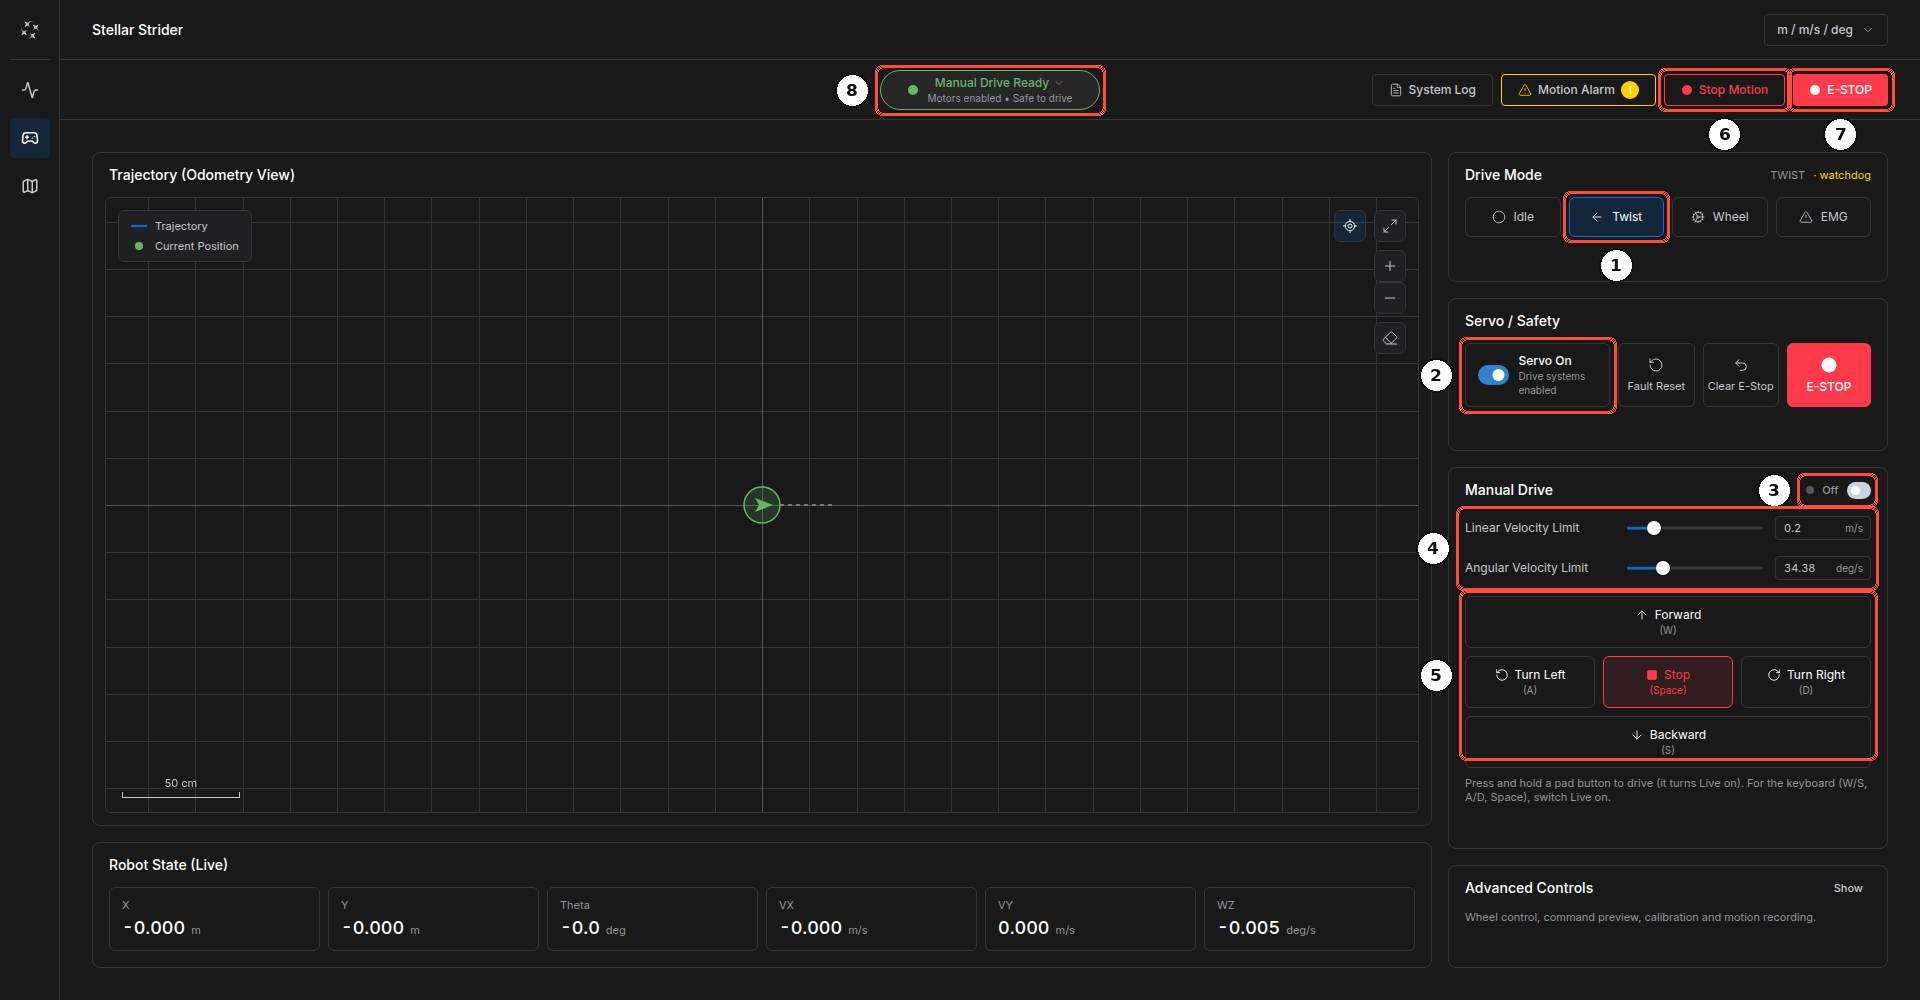
Tip: Switch on Live ③ in Manual Drive to drive with the keyboard: W/S forward and back, A/D turn, Space stops.
When you are done, switch the servo off and click Idle under Drive Mode.
What's Next
| Next step | Page |
|---|---|
| Let the Jackal localize itself on a map and drive to goals | Navigate in Simulation |
| Learn every part of the Station page | Stellar Station |
| Build your own robot documents | Stellar Designer, Gateway Designer |
| Move from simulation to real motors | EtherCAT Mobile Base, EtherCAT Gateway |
| Let an AI coding agent do it for you | AI Coding Agents |